Dec 27, 2007

Tis' the season of Holiday Cookies!

Ya, okaaay Christmas is over, however baking-holiday-cookies-season isn't! But before I move to the food ramblings bit of my post, I would just like to say that in 3 days I'm off to Dubai for the second half of my winter vacation...although I am quite sure it will feel like anything but winter over there!! Hurrah for sunny weather! I do hope that I will be able to take some interesting photos, even though I'm guessing that most of it might involve tall buildings, extravagant shopping malls, a lot of palm trees and hopefully I'll get to go to the desert again. Here are some pictures from my last trip to Dubai... (May 2006, 45 degrees celsius, and a tan in less then 30 mins!)

Now to the food part. Yum!

I don't know if I've said this before, but I'm not so much of a follow-recipes-in-a-book type of person. Sure I follow recipes, but only the ABC's and then I try to add a twist to the basics. I don't have that many cooking books, and I find more pleasure in creating then in following recipes. Anywhoo, to my surprise, as I was drooling at some delicious food photos on one of my favourite sites http://www.tastespotting.com/, my eyes stopped on a "holiday cookies" themed image that was linked to http://www.washingtonpost.com/. There was a compilation of holiday cookies recipes, and one of them I found very appealing: almond buttons, which I then read was adapted from "New Almond Cookery," by Michelle Schmidt (Simon and Schuster, 1984).
The recipe did not look too complicated, so that reassured me as I have cookiephobia (I've always found cookies harder to bake then cakes... don't ask). With a deep breath, after months of not having made cookies, I decided to face my fear: almond buttons it was. After having tried to figure out how much a "stick" of butter was (sorry, I work in grams...how much is a stick of butter?!), I went ahead and started toasting the almonds, weighing the flour, melting chocolate, etc etc...

One thing however- initially I really wanted to replace the almonds by pistachio...therefore making "pistachio buttons" I guess. But not enough pistachios there was in the kitchen that day- they were outnumbered by almonds, and I had no choice then to go with the original recipe. Aargh, frustration!!

I used half the amounts indicated in the recipe, and it still made more then enough for a first trial- approximately 40-45 cookies! The result was fantastic, they taste scrumptious and are super easy to make! Ever since, I've made these cookies four times in less then a month, as I gave many away to friends and family. For the recipe, continue reading...


Recipe for almond buttons (my half-recipe from the original one, I omit some ingredients too):

Ingredients:
  • 1 cup whole, skin-on almonds, toasted (explained below)
  • 1 cup flour
  • 1/2 cup sugar
  • Pinch of salt
  • 100gr butter
  • 1 teaspoon vanilla extract
  • 100gr semisweet chocolate
  • Skin on almonds for decoration (about 45 pieces)

How to make it:

  1. Toast the skin-on almonds: cook them in a heavy, dry skillet (preferably cast-iron) over medium-high heat, stirring constantly, for 2 to 3 minutes, until they are lightly browned and begin to smell toasty. Watch carefully; nuts can burn quickly. Transfer to a dish to cool.
  2. Finely grind the almonds in a food processor or blender and transfer to a large mixing bowl.
  3. Then add the flour, sugar and pinch of salt. Personally, I put all these powdering ingredients again in a food processor.
  4. Melt the butter, and add with the vanilla extract to the flour, almonds and sugar.
  5. Use your hands to work the dough, until it becomes soft and non-sticky.
  6. Transfer dough to fridge for at least 20 minutes.
  7. Preheat oven to th5, and pull dough out of fridge
  8. Form small cookie dough balls, and with your thumb make a little "hole" in the middle. The original recipe calls for a melon baller, but if you don't have one, then your thumb works out just as well!
  9. Bake for 12 minutes.
  10. Pull out, do not touch (they crumble!!) and let cool.
  11. In the meantime, melt chocolate in a bain marie. Then drizzle a small amount of the chocolate into the indentation of each cookie. Top off with an almond. Let cool, and enjoy!

P.S: these cookies keep their crunch extremely well for days, as long as they are kept in an air-tight container!

Original recipe can be found here: http://projects.washingtonpost.com/recipes/2007/12/12/almond-buttons/

Dec 24, 2007

Merry Christmas

No snow, some cold winds, but it definately still feels like Christmas! This year, I'm spending Christmas in Paris, and the rest of my holidays some place else... Each year, one of my favourite things to do is check out the Christmas decoration in the streets of Paris. As it's a must, I checked out the Champs-Elysees and absolutely loved their new lights- lavendar, light blueish dots twinkling in tree branches, and in between lines of "drops" flashing (it's a bit difficult to explain, but it's very beautiful!)

And then, another "must" is walking through what turned out to be a very very crowded Boulevard Haussmann- where the infamous Galeries Lafayette and Printemps shopping department stores lie. As usual, there are always too many people standing in front of the Christmas vitrines, especially the ones full of stuffed animals- thick lines of excited and jumping kids pointing at cute penguins and ooh-ing & aah-ing at gigantic polar bears. To take a picture of those vitrines is almost mission impossible, and trying to step over or push a kid is a no-no, however tempted I sometimes may be... Inside my adult body, I am still a child, and also want to say hello to the bears sitting on ice-cream filled fridges!


The gigantic Christmas tree at Galeries Lafayette- a classic each holiday season


Beautifully styled fashion vitrines


Day-dream like vitrines filled with toys, laughter and imagination

I actually can't believe I am blogging this very minute, a few hours away from Christmas Eve dinner...but I do think this is some good time-off from the fuming busy kitchen. And so very quickly, all I wanted to do is share a photo of the first dessert that is ready to be devoured later tonight, one of my inputs to the dinner table. A big chocolate cake enhanced with many delicious ingredients. And it is not a coincidence that each bite contains Christmas colours- green, white, red...

I am not so much of a buche person, the reason why I went for a "normal" round shaped-cake instead- just that it's dressed in a fancy attire to make a pretty entrance at the end of tonight's Christmas meal! The recipe of this cake is at the end of this post. It is a chocolate cake with a layer of whipped cream, strawberries in cognac, all sprinkled with pistachio and cocoa on a layer of melted chocolate.


On a final note, as this year comes to an end, I am questionning my "culinary orientation"- am I suddenly becoming more of a baker? I've always considered myself as a cooking/salty person, but this year seems to have shown quite the opposite. I have discovered the colourful, beautiful, delicate, sometimes romantic, charismatic side of baking...(as much as I still adore cooking!). So we will see how my kitchen adventures turn out in 2008.
I wish everyone a very Merry Christmas, happy holiday, and fantastic New Year!

Recipe for my Christmas cake:

Ingredients:


  • About 250gr strawberries
  • Half a cup of cognac
  • 4 eggs
  • 110 gr sugar
  • 100gr dark chocolate
  • 100gr butter
  • 120gr flour + baking powder
  • 300cc liquid 30% cream
  • 100gr dark chocolate (to melt over cake)
  • Pistachios- not salty
  • Bitter cocoa (optional)

How to make it:

  1. Clean strawberries and dice. Place in a bowl with the cognac. Set aside.
  2. Whisk liquid cream until it becomes whipped. Set aside in fridge
  3. Grind pistachios until powdery, and set aside
  4. Preheat oven to th5.
  5. In a bowl, add sugar and eggs. Whisk together
  6. Melt the chocolate, and add to bowl along with the butter. Mix all well
  7. Add the flour and baking powder. Mix batter well.
  8. Pour into a cake mould, and bake for about 40 mins
  9. When ready, pull out cake, let cool, and slice horizontally.
  10. On the bottom cake slice, pour over the cognac from the strawberry bowl. Even if it is not enough- that's OK. Little droplets will perfume the cake.
  11. Follow with a layer of the whipped cream, and then add the strawberries.
  12. Close cake with the top cake slice.
  13. Melt chocolate in a bain marie, and add the melted chocolate over the now "closed" cake.
  14. Sprinkle the pistachio all over, and optionally, some patches of bitter cocoa.
  15. Place in fridge for a couple of hours before serving.

Oh and P.S: the "snowball marsmallows" are simply white marsmallow cubes dipped in melted white chocolate, and then rolled in coconut!

Dec 13, 2007

My love affair with Nutella and Crème de marrons

While everyone was eating peanut butter and jam, I was relishing on my personal favourite combination: nutella and crème de marrons (sweetened chestnut cream). Go back probably 10-12 years ago, packed lunches or 4PM milk and snack time and you would have seen one same thing in my hands under grinning eyes just waiting to be eaten: nutella and crème de marrons spread on a crepe, cake, biscuits, bread… or just devoured off a spoon.

Today, I still love the delicious combo just as much. I mean, Nutella is great, but it’s just not the same with that chestnut delight. Even if it means multiplying calories x 2, but it is SO WORTH IT! Oh baby, I can hear my stomach growling as I write these words! Help!

So not too long ago, I decided to use both ingredients in a new way. Nothing too sophisticated- just something simple to remind me of my childhood. Crème de marrons sandwiched in between a Nutella cake. Basically, instead of using, for example, chocolate in a cake batter, I used Nutella instead. Once baked, and then left to cool, I slice it horizontally, and start spreading a thick layer of crème de marrons and stick both slices back together. Something very easy to make, as you will see in the recipe at the end of this post!

The funny chestnut guy on the crème de marrons packaging :-)
But whatever your tastebud mood may be, remember

1 (Nutella) + 1 (crème de marrons) = infinity

…because the combinations are trully limitless !

Recipe for Nutella & Crème de Marrons cake:

Ingredients:

  • 50gr Nutella
  • 50gr Butter
  • 2 eggs
  • 60 gr sugar
  • 60 gr flour
  • Baking powder
  • A jar of crème de marrons

How to make it:

  1. Preheat oven to th5
  2. Melt the butter. Then add the nutella on top and mix well until they “form one”. Set aside
  3. In a bowl, add the eggs and sugar, and whisk together.
  4. Then add the nutella/butter combination. Mix well.
  5. Follow with the flour and baking powder. Mix the batter well.
  6. Place batter in cake mould and bake in oven for 30 mins
  7. When ready, take out and let cool. Slice cake horizontally, and spread the crème de marrons on one of the cake “slices”. Stick both slices back together. Sprinkle with bitter cocoa if you wish.

Dec 10, 2007

Have you tried a Martini Tiramisu yet?

It happened once again. I had a food dream the other night (this has been happening quite often lately). Delicious dreams of ingredients, colours, tastes and textures. I am just happy I’ve never unconsciously eaten my pillows or blanket during one of those food-dream moments.

Well, I shouldn’t really be complaining, should I? What is there to complain about when I’m dreaming about a tiramisu? Maybe I wasn’t complaining in the first place, and maybe I should get to the point. Martini Tiramisu. What the on earth is that? A Martini Tiramisu is basically a female specimen of the tiramisu variety. I call it female because of all the pink in it, and the generally “girly” look it has. Based on the classic recipe, it uses biscuits roses de Reims and raspberry coulis instead (the latter going against the entire notion of the original tiramisu’s purpose of being a caffeine booster)(but hellooo, we are in the 21st century- so experimentation is totally allowed). As for the alcohol ingredient… as I was thinking (or rather dreaming) of pink, Martini Rosato was the only fit candidate, really. What you get at the end is therefore a tasty and different tiramisu prettily decorated with fresh raspberries.

I can totally see that Hello Kitty cat eat this, except that wait…if she’s a minor then she can’t have it because of the alcohol. So maybe a character from SATC instead? But do they really eat? I can’t imagine that they do- how will they fit in a size zero dress then?

In any case, I ate it, and I ate it guilt-free…not worrying about any size zeros or how pink it all was (I usually have a thing against the colour pink). I also shared it with my tasters who gave me good feedback- so this will be a recipe I will save and use again for another occasion.

As for the dreaming, I’m just happy I don’t sleep with some delectable John Hamm (Don in Mad Men) look-alike…who would probably wake up to only find me drooling as I’m still caught up in my scrumptious reverie…


Recipe for Martini Tiramisu:

  • 360cc coulis de framboise
  • 30cc Martini Rosato
  • Another 30cc Martino Rosato
  • 4 egg yolks (the proper Tiramisu needs eggs, but I personally omitted it from mine)
  • 100gr sugar
  • 450gr mascarpone
  • 230cc whipped cream
  • 40 biscuits roses
  • raspberries

Who to make it:

  1. Mix the coulis de framboise and Martini Rosato. Set aside
  2. Beat the egg yolks in a bain marie, until they become a bit fluffy
  3. Beat in the sugar and one of the 30cc Martini
  4. Continue whisking eggy mix until it thickens and bubbles start just appearing
  5. In a seperate bowl, whip the mascarpone
  6. Then add the eggy mix
  7. Then add the whipped cream. Mix all well until smooth
  8. Soak the biscuits roses in the coulis de framboise and Martini mix. Then line up a first row in a container
  9. Spread over the creamy mix
  10. Repeat with a second layer of biscuits + cream
  11. Place in fridge for about 4 hours
  12. Take out and decorate with raspberries

Enjoy :-)

Dec 6, 2007

Holiday Deliria!

You know what- I love cooking and baking, but I also love marketing, advertising, trends that come and go, product launches, design, innovation, etc... And towards the end of each year, all these factors combined seem to appear in the culinary world all around the city (I'm in Paris). Every week, there's something new to discover, taste, or to read about. It's thrilling and feels like adrenaline running through my tastebuds!
Less then a month to go! Goodbye 2007, hello 2008! And no, I am not making any New Year's resolutions...except that maybe my sweet tooth will continue getting sweeter in the years to come. Something definately to look forward to, especially when each holiday season the big food names in France pull out absolutely fabulous holiday deliria in eatable (drinkable too) formats!

So I wanted to share some recent creations I've spotted. Interesting, fantastic, festive, "wow" creations! Stuff that leaves me in awe and reminds me why I love culinary arts in the first place.


Where do I start?


Lenôtre- very famous patissier, traiteur, chocolatier, caterer (and the list goes on) in France. It's been around since 1947, and now has shops open in 12 countries. Each year, Lenôtre pairs up with a designer for a unique Christmas buche. This time, the honour goes to Karl Lagerfeld for the 2007 buche- but also the 50th anniversary of Lenôtre buche!


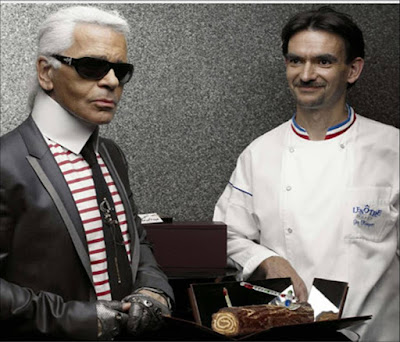
Rock'n'roll, chocolatey, gingerbready, with tones of bitter orange and rivers of apricot-orange coulis. It comes presented in a mysterious box, and surrounded by mirror walls, so that the buche can ask "mirror mirror on the wall, who is the deliciousest of them all"?

For more info: http://www.lenotre.fr/

Fauchon- another reknown patissier, traiteur, highly recognizable with it's signature brand colour: pink. What they've done this year happens to be my favourite, and that does'nt even include their stunning campaigns (I LOVE them!!) that just scream glamour, appetite, and celebration (you should had seen last year's- unbelievable!)

As I was checking their 2007 holiday revelations, I fell on this very cool éclair- from the name to the way it looks! The "éclair fourrure" is sprinkled with coconut and silver sparkles! How cool is that??!!! After the macaron craze, I see an éclair mania coming up..

And for those who prefer something salty, there is an éclair au truffe!!


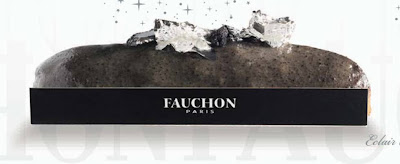
On a more cakey side, please admire this amazing satiney "buche baroque"

And this 
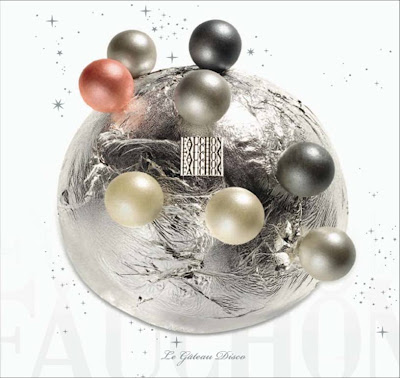
gateau disco!! Can I say OMG a hundred times in a row please?!

Fore more info: http://www.fauchon.fr/

Pierre Hermé- well yes, I had to include him too! The master of surprises, a true magician, one who can play around with almost any flavour, texture, smell, taste, shape...and then create unique wonders- the 8th wonder of the world is him with no doubt!
I don't think much words are needed, because the images speak for themselves!
Look at this buche à la truffe noire ! LOOK AT IT!!

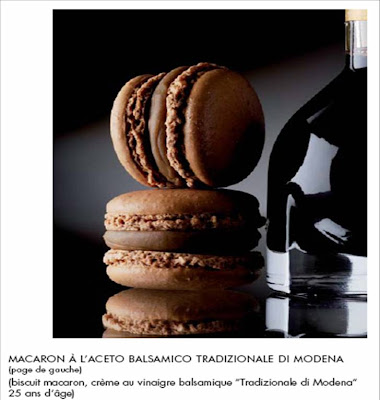
And wait, it's not over. Please ouh and ahh again for these balsamic vinegar macarons!!! BALSAMIC VINEGAR!!


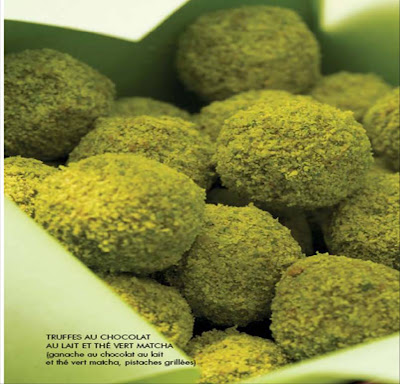
And in a certain way, I could see this coming. I could see matcha appearing somewhere, somehow. And there it was: exquisite milk-chocolate and matcha truffles, rolled in crushed pistachios. Matcha really is "the" thing these days, huh.

Of course there are other wonderful things, but these were my personal faves.


For more info: http://www.pierreherme.fr/

Ladurée- another distinguished house, particularly well known for their macarons. Not only are their macarons beautiful- but the boxes!! The boxes, I repeat! Some of the most dazzling boxes I have ever seen!
I mean, look at this one, the "baroque" collection.


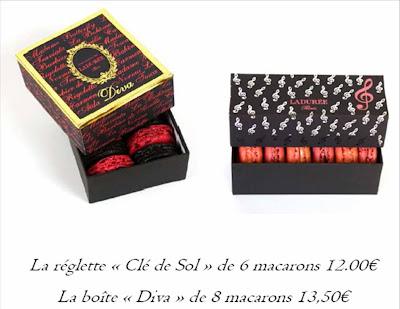
And the "diva" (left) and "clé de sol" (right). The diva macarons are precious- red and generous coverings of feuilles d'or.


On a side note, it was also interesting to see Ladurée's recent collection at Sephora! Shimmering brioche scented body powder and macarons soaps are just a few delicious cosmetic items!


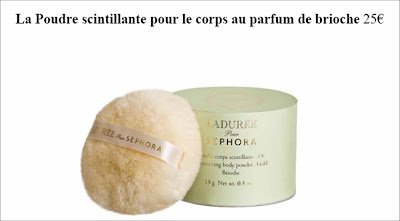
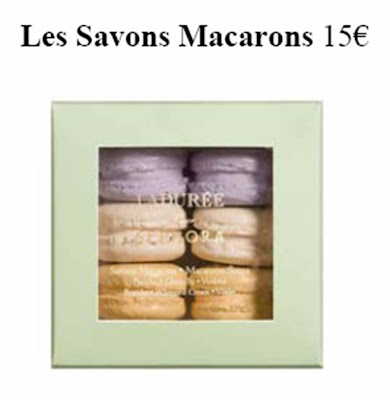
If I had those soap macarons, I'm not sure I would want to wash my hands with them!! They are too pretty to be used up!!

For more info: http://www.laduree.fr/

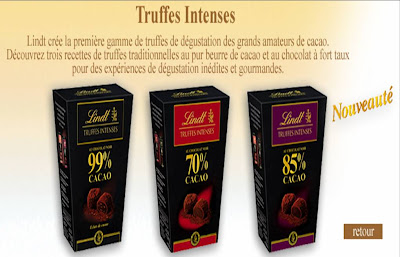
Lindt- A while back, I had heard about Lindt's 99% chocolate. Naturally, when I found it, I had to buy it. Definately not something to be eaten in chunks, but should rather be enjoyed as if it was a wine-tasting session. Recently however as I was buying some stuff in the chocolate aisle (where you're very likely to find me :-) ). I found the 99% concept being transported into truffles!! Haven't had the chance to try them yet...but it must certainly be something interesting...and intense!

For more info: http://www.lindt.fr/


Evian- I'm not sure how Evian ends each year accross the world, but in France they always have a limited edition bottle. Sometimes they are nice, sometimes they are OK, but this year there's a luxurious feel as Christian Lacroix designed it! And even more luxuriously is that there are two bottles!!
A "pret a porter" bottle with prints that reminded me of a baboushka doll...? A very Nordic/Russian thing going on maybe?


And an "haute couture" bottle! PE-LEASE!!! I love this extravaganza!!


For more info: http://www.evianparchristianlacroix.fr/

Piper Heidsicker- champagne is yet another story! I haven't had the time to look around much, but I had been noticing all these print ads with chandeliers made of upside down champagne glasses...and then written was Viktor & Rolk for Piper Heidsicker. These two designers are geniuses, and I've loved their work since the start. They've no become incredibly well known and they have got real talent. They coupled up recently with H&M, and now on a more upscale level with Piper Heidsicker on a "rose sauvage"champagne. Even the name "rose sauvage" is amazing!!

For more info: http://www.piper.viktor-rolf.com/


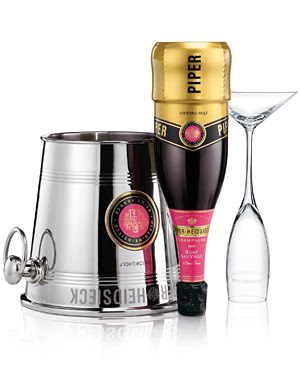
One thing I seem to have noticed this year is an interest in baroque influences? Ladurée, Fauchon and now that I come to think of it...that Lacroix Evian bottle. All are referring to baroque styles...the underlying trend maybe? Well, one thing is for sure, fashion and food are definately brothers from different mothers. A shared passion, but expressed in different ways-and to me, that is a wonderful thing indeed.

So with all of this said, I can only hope that in 12 months time the holiday deliria will be even more delirious!

Dec 5, 2007

Bread-elights!

Bread is not something I make so often. Being in France, I usually enjoy buying the delicious bread, baguettes & co, available at charming boulangeries. Plenty of shapes, colours and tastes abundantly arranged on bakery shelves, to choose from. And please, spare me with the "carbs are bad" lectures. I LOVE CARBS and I'll shout that on top of a roof if necessary!

If I think about it, I have so many memories about bread. When I was a kid, I used to poke at the insides, and eat only the stuffing- the delightful soft fluffy bit- and leave the “hard” crusts to my parents. Aww...how sweet. I must had been a really nice kid eh. Then I also remember breaking chocolate bars and placing them between slices of warm bread. Now THAT is good stuff. Especially with butter- terribly sinful, but very forgivable! I also remember my grandfather introducing to me a very simple concoction: mix lemon juice with sugar, and spread that mixture on a buttered slice of bread. In some ways, I wish he hadn’t taught me that, because for many months later, it was pretty much all I was eating. Sugar, lemon, butter and bread. No wonder I developed a sweet tooth in my adulthood…And there is one thing I’m sure many can relate to- buying bread, and eating at least a quarter of it before you even get back home. It starts with breaking off a piece, then another one, get in the car, start the engine, eat another bite, start driving, stop at a traffic light, can’t resist the smell of fresh bread in your car, eat yet another bite…get back home and act completely astonished and clueless as to where half of the bread has disappeared! Oh!

With all these wonderful associations and thoughts about bread, naturally, I decided to make some. I wanted to make something pretty and tasty, so I thought of using some pistachios and green olives in my mix.

When the dough was ready, I found myself with a shape that led to something quite interesting. As my knife was slicing away, I realized that I was getting long biscotti shaped pieces- except that they were ten times softer then biscotti! These green polka-dotted breads would be perfect for a stylish dinner, placed in long glasses for people’s fingers to reach out to. Their fingers would then capture a delicate fragrant scent of olive oil... I absolutely loved the result, and am definitely sharing the recipe- just scroll down a bit more!

Recipe for olive & pistachio brown bread:

Ingredients:
  • 250 g brown flour
  • 15g yeast
  • Green Olives
  • Pistachio (unsalted)
  • 20g olive oil + some for rubbing
  • 150ml warm water

How to make it:

  1. In a bowl, throw in the brown flour, prepared yeast, olive oil, pistachio, and diced olives. Do not add salt because the olives contribute to this. Mix these ingredients around for a bit.
  2. Then add the warm water. Knead for 10 minutes. The kneading will help the bread’s elasticity, so it keeps a smooth surface when baked.
  3. Place dough ball in an olive-oiled container, and leave so that it can rise.
  4. Once risen, preheat oven to th8. Shape dough as desired, and bake for 10 mins on th8, and 20mins on th6 (timing depends on the size of the dough ball).

Take out of oven, slice and enjoy! This can also be made with white flour of course- whatever you prefer really!

Dec 3, 2007

Defying the laws of cheesecake

Wow, so I am being completely out of season these days with my rather summery recipes in this cold month of December. Hmm, maybe Freud could help me unlock the meaning of my culinary jet-lag

Anyway, let’s get to the heart of the subject: cheesecake. Everyone loves cheesecake! If people were throwing cheesecake gifts to each other instead of bombs and stones, man would this world be a better place! Clouds of creaminess on golden crunchiness flying in the air, left and right, defying the rules of gravity landing into the hands of happy people illuminating their eyes filled with sugar sparkles… aaaahhh

Ummm…just ignore that last sentence. If it doesn’t make sense, then that’s perfectly normal.

:-)

So back to cheesecake. I had my first slice of cheesecake many years ago. I was first introduced to cheesecake by some American friends in middle school..or lower school..can’t remember anymore. However what I do remember is that it was so unbelievably good, and ever since I’ve been enjoying homemade cheesecake. As for the recipe, well there seems to be many versions of it. Eggs, no eggs, bake, no bake, etc etc. I’ve personally never used eggs in my cheesecakes because the truth is that I’m not an egg person. Now I know what you’re thinking: how can a cooking-baking lover not like eggs? I don’t know. I just don’t like the taste of eggs. Actually, when I was a kid, I was allergic to eggs, especially egg whites. They’d go in my mouth, and go straight out again (ehehe, sorry for being so disgusting). But hey, let’s get something clear: I eat eggs, I just don’t like tasting them. That means I’ll eat cakes that include eggs, but I won’t eat a boiled egg or an omelette. And I don’t like dessert with an “eggy” taste. So basically I like undercover eggs. Eggs in disguise. Right, so enough about eggs. I’m drifting from the main subject again.


Cheesecake. So yes, I’ve never included eggs in my cheesecake recipes for all the reasons above. Recently I experimented around with the recipe, which led me to a limoncello cheesecake. If you want, you can consider it a more European version…? Why? Because it includes many European ingredients such as: ricotta (instead of the cream cheese) lemon sablés and limoncello. The result is a delightful layering of creamy clouds floating on a sweet yellow sky, overlooking a golden crunchy beach… A charming sugary dessert topped off with glowing sunrays (the lemon rinds).

For the recipe, just continue reading… Please note however that I have not included quantities as I didn’t measure while I was making it… very sorry! A lot of it is basic stuff though...

Recipe for limoncello cheesecake:

Ingredients:


  • Ricotta
  • Icing Sugar
  • Lemon sablés
  • Butter
  • Lemon rinds
  • Limoncello
  • Sugar
  • Water
  • Gelatine

  1. Prepare the limoncello gelée. Mix limoncello, sugar and water. Soak the gelatine in warm water for about 20 minutes, and then drain. Then add the limoncello, sugar, and water mix to the gelatine “liquid”. Pour in a container and place in freezer until it becomes solid.

  2. Take out your cooled cheesecake moulds or cups (to cool, keep them in the fridge beforehand)

  3. Melt some butter, and crush the lemon sablés. Add the butter to the crushed lemon sablés to form a layer on the bottom of your cheesecake mould/cup.

  4. With a knife, “slice” layers of the limoncello gelée and add on top of the lemon sable base

  5. Mix ricotta with icing sugar. Add as final layer on top of the gelée.

  6. Place in fridge for a couple of hours
  7. In the meantime, cut off lemon rinds from a clean lemon. Place in a pan with some sugar and water over heat so that rinds become soft and eadable. Add water gradually when needed. When done, set aside and use for decoration.